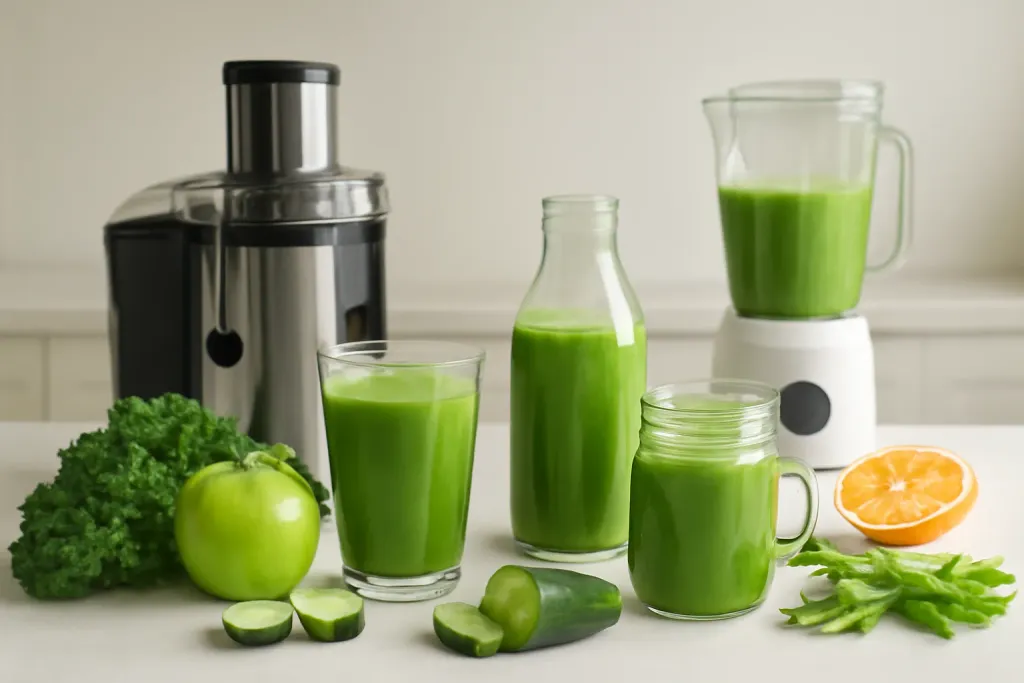
What to Know Before You Buy
If you are building a beginner juicing equipment checklist, start with the way you plan to use it. Some people want simple morning green juice, while others want more smoothies, batch prep, or a mix of both. That choice affects the tools you need, the counter space you should save, and how much cleanup you are willing to do after each use.
A beginner setup does not need to be complicated. In many kitchens, the smartest approach is to begin with one main appliance and a small set of support tools. That usually means deciding whether a juicer, a blender, or both should come first. A juicer separates liquid from pulp, while a blender keeps the full ingredients in the cup. If you want both juices and smoothies, it helps to think about storage containers, prep tools, and cleaning supplies at the same time.
It is also worth considering the ingredients you buy most often. Soft produce, leafy greens, apples, cucumbers, citrus, ginger, frozen fruit, nut butter, and ice all behave differently. The equipment you choose should fit those everyday ingredients rather than a long list of special cases. For beginners, simple and easy-to-clean tools usually make it easier to keep the habit going.
Core Appliance to Choose First
The first big decision in a beginner juicing equipment checklist is the main appliance. If you want juice without fiber, a juicer is the more direct tool. If you want thicker drinks, blended green smoothies, or an all-purpose option for fruit and vegetables, a blender may be the better starting point. Many beginners eventually use both, but there is no need to buy everything at once.
For juicing, there are two common styles to understand. Centrifugal juicers are often associated with faster prep and a simpler learning curve. Masticating juicers are usually chosen by people who want a slower process and more flexibility with leafy greens and softer ingredients. You do not need to focus on technical claims to choose well. Instead, look at the feed chute size, how much prep the machine requires, whether it has a pulp bin, and how easy it is to assemble and wash.
For smoothies, a countertop blender with a sturdy pitcher is often enough for beginners. A personal-size blender can be useful if you are making a single serving and want less cleanup. Look for a jar shape that fits your routine, a lid that seals well, and controls that feel easy to understand. If you plan to use frozen fruit, leafy greens, or ice, it helps to choose a blender made for everyday home use rather than a very basic drink mixer.
If you are trying to keep your first purchase simple, ask one question: which drink will you make more often in the next month? Buy for that use first, then add the second appliance later if the routine sticks.
Prep Tools and Cutting Basics
Even the best appliance works better when prep is easy. That is why prep tools belong on every beginner juicing equipment checklist. A basic cutting board and a sharp chef’s knife are usually enough to get started. These are the tools that help you trim produce into pieces that fit the feed chute or blender jar without making the process feel messy or slow.
A simple vegetable peeler can be useful for produce with tough skins, and a citrus tool can make oranges, lemons, or limes easier to handle if you plan to use them often. Some beginners also like a pair of kitchen scissors for removing stems or packaging. None of these items need to be fancy. The goal is to reduce friction, not create another drawer full of gadgets.
If you are buying a juicer, think about the size of the opening and how much chopping you are comfortable doing. If you are buying a blender, think about how easy it is to load ingredients in the right order. Many smoothie recipes work better when softer ingredients and liquid go in first, followed by greens, then frozen fruit or ice. A small prep setup makes those steps easier to manage.
Keep your prep zone close to the sink if possible. That makes it easier to rinse produce, discard peels, and clean up scraps as you go. Beginners often stay more consistent when the setup is simple enough to reset after one use.
Pulp, Froth, and Straining Options
Juicing and blending create different textures, so a beginner setup should include a plan for pulp, froth, and strain. If you are using a juicer, the pulp container may be built in or separate, but you may still want a bowl or compost container nearby. That makes it easier to empty scraps without interrupting the process.
Some beginners also keep a fine-mesh strainer or nut milk bag on hand. These are optional, but they can help if you want a smoother juice or if a recipe leaves extra foam or pulp behind. For smoothies, a strainer is less common, but a tamper can be useful if your blender model allows it and the ingredients need a little help moving toward the blades. Only use accessories that are designed to work with your appliance.
A large spoon, silicone spatula, or small scraper can also help with both juicers and blenders. These are practical for collecting mixture from the sides of the jar or moving pulp into a container. If you are building a checklist from scratch, do not overlook these small tools. They are inexpensive in the sense that they are basic, but they can make cleanup and batch prep feel much more manageable.
Storage bins or reusable containers for pulp are worth considering too, especially if you plan to add pulp to baking, soups, or vegetable patties later. The idea is not to overcomplicate your kitchen. It is to give each part of the process a place.
Browse our recommended products
Our featured picks refresh periodically. While we update them, our editorial guides can help you find the right pick.
See our guidesCleaning and Maintenance Essentials
For beginners, cleanup often determines whether juicing or smoothie making becomes a habit. That is why cleaning supplies belong near the top of a beginner juicing equipment checklist. At minimum, keep a dish brush, a sponge, and a safe place for drying parts. If your appliance has multiple removable components, a drying rack or clean towel can help keep everything organized after washing.
It is useful to check whether the appliance has narrow parts, strainers, or crevices that may need extra brushing. The easier it is to rinse right away, the less likely food residue is to dry onto the parts. For that reason, many beginners do better with a setup that can be taken apart without too much effort. When comparing options, look for components that are straightforward to remove, wash, and store.
A small bin for dirty parts can also be helpful if you clean up in stages. You may rinse the pitcher or juicer assembly first and wash everything more carefully later. Just make sure used parts do not sit too long before cleaning. A simple routine often matters more than a large number of accessories.
To protect your appliance, follow the care instructions that come with it. That includes whether parts are dishwasher-safe, whether blades need hand washing, and whether certain pieces should dry fully before reassembly. A beginner-friendly machine is one that fits your actual cleaning habits, not your ideal ones.
Storage for Ingredients and Batches
Good storage helps beginners keep produce fresh and drink prep organized. For a beginner juicing equipment checklist, add a few containers before you buy a large number of specialty accessories. Reusable glass jars, food-safe bottles, or sealed containers can be useful for storing prepped ingredients, completed juice, or smoothie components in the refrigerator.
If you buy greens in larger bundles, it helps to have produce storage that supports rinsed and dried leaves. If you buy fruit for smoothies, a freezer-friendly container can help you portion berries, banana slices, or other ingredients in advance. For juice, smaller containers are usually easier to manage if you plan to make a single serving at a time. If you make enough for later, leave room for the ingredients and store the drink according to your usual food-safety practices.
Labeling is a simple habit that beginners often appreciate. A piece of tape and a marker can help you track what is in a container and when it was prepared. That is especially useful for batch prep. A clear system makes it easier to avoid waste and keeps the kitchen from becoming cluttered with mystery containers.
You do not need a large pantry overhaul to start. A couple of good containers, a shelf in the fridge, and a freezer space for smoothie ingredients are enough to support a practical routine.
Beginner Juice and Smoothie Staples
Once the equipment is in place, it helps to stock a few simple ingredients that work in both juice and smoothie routines. For green juice, common beginner staples include cucumber, celery, romaine, spinach, parsley, green apple, lemon, and ginger. For smoothies, beginner-friendly options often include spinach, kale, banana, berries, mango, yogurt or plant-based alternatives, oats, nut butter, and unsweetened milk or water depending on preference.
The point of stocking staples is not to follow a perfect recipe. It is to make it easy to assemble something usable from what is already in the kitchen. Many beginners do well with a simple formula: one green, one fruit, one liquid base, and an optional add-in. That approach works for smoothies especially, because it gives you a repeatable structure without requiring a long ingredient list.
For green juices, it is often easier to start with familiar flavors and only add one new ingredient at a time. That keeps shopping simple and helps you learn which produce you naturally use up. If your fridge space is limited, choose ingredients that you can rotate between juice, smoothies, salads, and snacks. Versatile ingredients make beginner prep less wasteful and more practical.
Keep a short grocery list on the fridge or in your phone. When the ingredients are easy to remember, the equipment gets used more often.
Simple Checklist to Start
If you want the shortest version of a beginner juicing equipment checklist, start with the essentials first and add extras only when needed. A practical starter list usually includes one main appliance, a cutting board, a sharp knife, a peeler if needed, one or two storage containers, a cleaning brush or sponge, and a place to dry parts. If you are making juices, add a bowl or container for pulp. If you are making smoothies, add a blender jar or personal cup that matches your appliance.
Here is a simple way to think about the first purchase round:
- Choose one main appliance: juicer or blender.
- Add basic prep tools: board, knife, and any simple trimming tools you use often.
- Set up cleanup: brush, sponge, drying space, and a place for used parts.
- Plan storage: a few reusable containers for ingredients or finished drinks.
- Stock a small ingredient set: greens, fruit, liquid base, and one or two extras.
If you want to keep the setup beginner-friendly, resist the urge to buy every accessory at once. Most home routines improve when the equipment is simple, the ingredients are familiar, and cleanup is fast enough to repeat tomorrow. A thoughtful checklist helps you get there without filling the kitchen with items you may never use.